Overview
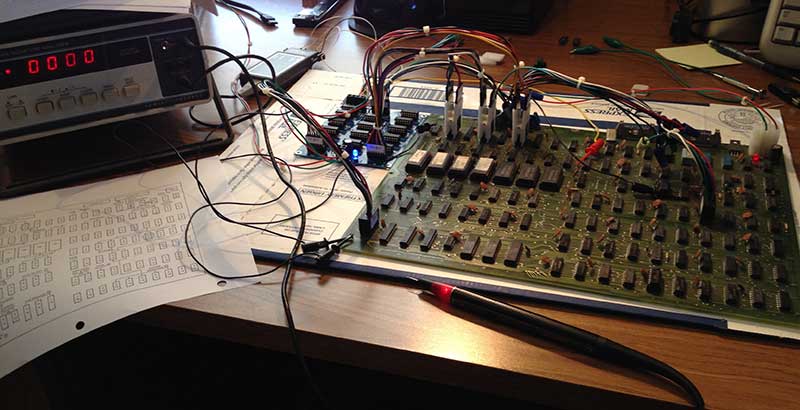
I recently set up a Cinematronics Exorciser PCB from Biltronix. After getting used to the system I was able to repair my non-working Cinematronics CPU boards. Below are repair logs describing the process:
Rev. B (Tailgunner)
Symptoms:
Breakers trip when board is powered up. Reset indicator PCB LED stays on.
Board had previously been unreliable, working for awhile, then not working, then working again. It had finally settled into not working before I did the repair.
Hooked up board to Exorciser and did initial tests checking RESET circuit.
Problem: IC output stuck high
Pin 6 of the 7425 at F12 was stuck high. Socketed and replaced chip and reattached wire patch on the top of the board. Confirmed with reset indicator PCB that the board was now running. Hooked up vector monitor and confirmed Tailgunner attract mode on screen.
Rev. B (Tailgunner)
Symptoms:
Breakers trip when board is powered up. Reset indicator PCB LED stays on.
Hooked up board to Exorciser and did initial tests checking RESET circuit.
Problem: Chip Output stuck low
Pin 5 of the 74LS151 at E4 was stuck low. My other Rev. B Tailgunner board had the correct signature 49P2. This chip had some wire patches that the other board did not. In socketing and replacing the chip I found this were from a previous repair that had affected the traces going to the chip. I had to replace some of these wire patches to install the socket.
After replacing the 74LS151 I found the signature was still incorrect. I tried hooking up the reset indicator PCB again and found the board was now running! Hooked it up to a vector monitor and saw the game running on screen. While I'm happy to have the board running, I wish the solution had been more clear.
Rev. K (Armor Attack)
Symptoms:
Reset LED stays on. This board turned out to have a number of problems as detailed below:
Hooked up board to Exorciser and did initial tests checking RESET circuit.
Problem: RESET circuit
RESET was unstable and affecting many circuits on the board. 74LS107 at B6 pin 12 signature (U6HH) was correct, but pins 5 & 6 were unstable rather than C32P.
Replacing 74LS107 at B6 fixed the RESET circuit. Signatures were correct (C32P) on pins 5 & 6 after replacement. This fixed many incorrect signatures around the board.
Problem: Incorrect Signatures
Location (IC) - pins
E6 (74LS163) - 7,11,12,13,14,15
D6 (74LS163) - 15 C6 (74LS163) - 15
E8 (74S288) - 2,4,5,10,11
G8 (74LS107) - 5,11
A12 (74LS32) - 11,12,13
I8 (74LS04) - 2
H8 (74LS02) - 1
H6 (74LS164) - 13
J2 (74LS32) - 11
J6 (74LS10) - 11
F10 (74LS151) - 2,3
Replacing 74LS163 at E6 fixed all these signatures. This circuit is circular, outputs in the circuit feed back to the beginning. Because of this it is impossible to follow the errors “upstream” to find a chip with good inputs and bad outputs. I was lucky and on my first try piggybacked a good 74LS163 onto E6 and found the signatures at the outputs were correct. Replacing this IC fixed the circuit.
Problem: Incorrect Signatures
74LS377 at M2 – 12 & 15, which output to the vector display.
Replacing 74LS377 at M2 corrected these signatures.
Problem: 74LS04 output stuck low
Pin 8 of the 74LS04 at B6 was stuck low. Replacing chip fixed the ouput.
Problem: Bad RAM
After socketing and replacing H12 and J12 the board still wouldn't run and the reset light stayed lit. In order to check the signatures on pins 12-15 on I12 and J12, pin 10 of the chip has to be grounded. After attaching the wire between ground and pin 10 the pin oddly wasn't grounded and all the signatures were incorrect.
Since this chip had just been replaced I started to suspect a bad RAM chip. I unhooked the Exorcisor connections, reinstalled the jumpers and swapped in the RAM test ROMs. After power up the board still kept resetting. I pulled the LS298 at J12 and applied power. Using the HP5004A probe as a logic probe I found that there was activity at the pins 12-15 at J12. These pins are outputs from the disconnected chip. In addtion when probing the pins the board quit resetting and started to run the RAM test code.
After turning off power, I cut the pins 1-4 from the RAM chip at M14. After reapplying power the same symptoms remained. I tried again, cutting pins 1-4 from the RAM chip at L14. This time, upon powerup, the reset LED flashed and then stayed off. The board was running!
Probing the pins at J4, the RAM test was unable to detect the bad chips since the problem was in the addess line inputs of the chips. However, it was very helpful in being code that didn't require working RAM to run. After the address lines were freed from the signals from the bad RAM the RAM test code was able to run and the reset light went off.
I removed the two RAM chips and the RAM test was able to correctly diagnose the missing chips as bad. I socketed and replaced the them and checked again. The RAM test diagnosed them as good. Reinstalled the Armor Attack ROMs and confirmed that the board was fixed!
Rev. K (Armor Attack)
Symptoms:
Reset LED stays on.
Hooked up board to Exorciser and did initial tests checking RESET circuit.
Problem: RESET circuit
RESET signature was incorrect, showing UUUU insted of C32P. Signatures at the inputs to LS107 at C8 were good, but the output signatures were incorrect. After socketing and replacing this chip, the board was fixed.


